Popular Halloween Paper Plate Crafts - Ghost, Spooky Eyeballs, Spiders
Ah, Halloween. The chilling, fun-filled holiday has both children and young adults alike excited for dressing up in their favorite costumes and going fob-or-treating with their friends. It'southward one of the most anticipated holidays of the twelvemonth, which is why preparations for it can be rather extravagant and start as early as September.
Elaborate Halloween decorations like jack-o'-lanterns and backyard cemeteries are definitely impressive to look at, only not everyone has the time or upkeep for them. Or possibly they simply have a more bourgeois taste in décor.
Any the case may exist, today nosotros'll be sharing some like shooting fish in a barrel-to-brand Halloween crafts which are relatively inexpensive and tin be embellished according to your personal preferences. What you lot'll be needing is: newspaper plates! Paper plates are the chief components of all these DIYs, which are perhaps one of the most versatile materials out there to craft with.
Want to up your Halloween décor game this year, but don't have that many fancy supplies? Fearfulness not! We've got an array of paper plate Halloween crafts which are merely what you're looking for!
Grab your newspaper plates and fine art supplies and become fix to start crafting!
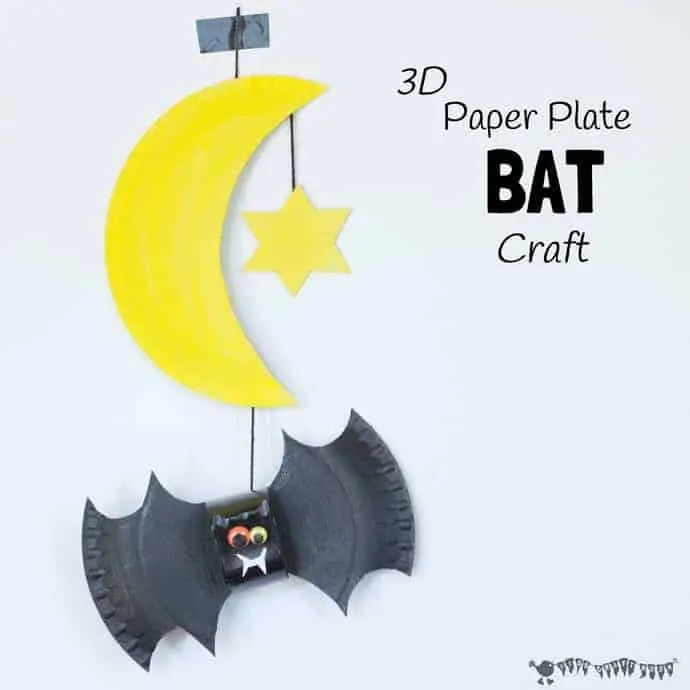
Newspaper Plate Bat And Moon
 Source: https://kidscraftroom.com/newspaper-plate-bat-arts and crafts-and-mobile/
If you have a slightly older kid who would like to make a more complicated craft for Halloween, this paper plate bat craft and mobile could be the perfect option for you. This 1 may require some adult input, but information technology's a really nice way to spend quality time with your child every bit you become the house ready for Halloween.
To make this mobile, you will need two plain newspaper plates, some blackness yarn, googly eyes, white paper, glue, glutinous tape, blackness pigment, and yellowish paint. Many of these are things that y'all may already take, and paper plates tend to be readily available around Halloween, so y'all should exist able to pick a pack up if you haven't got any.
This craft is wonderfully 3D, and the colorful eyes look fantastic. Those little fangs are besides ultra beautiful and give the bat a nice vampiric wait, ideal for terrifying your guests.
It'southward actually nice that this craft has two parts to it, considering your child gets to brand a total "scene" for their decoration, rather than just one thing. Hang both parts of the mobile from a tree almost the house or in your living room, and your kid volition enjoy lots of compliments from the guests who visit.
Who doesn't love bats? These are a brilliant craft for making your home wait scary and decorative, without having to spend a lot on the materials, and yous'll both accept fun making it!
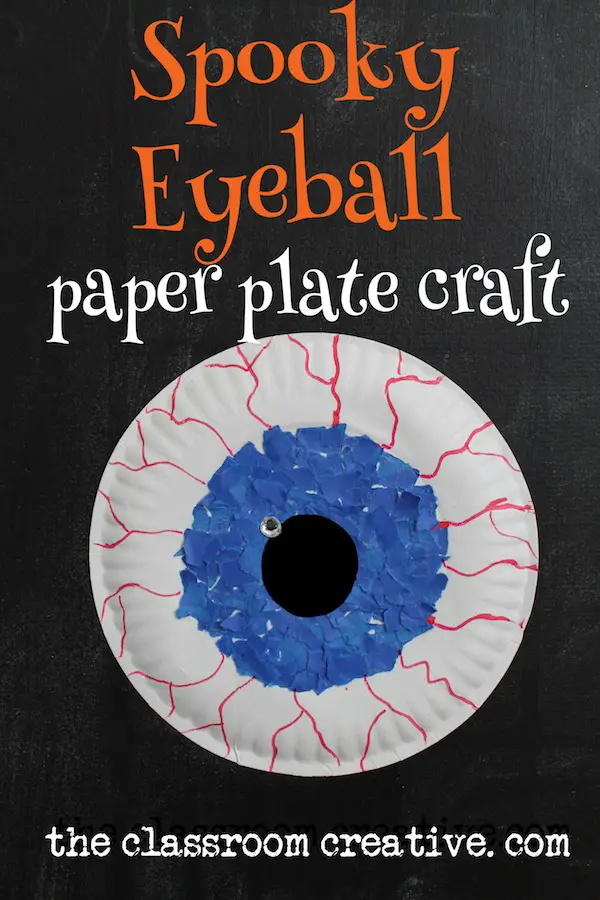
Spooky Eyeball
 Source: https://theclassroomcreative.com/2013/10/halloween-paper-plate-spooky-eyeball-craft/
If you want a really spooky ornament for your wall or to hang above the heads of your guests and make them feel they are permanently being watched, a newspaper plate eyeball is a groovy add-on to any Halloween decorations.
Materials:
To make a spooky eyeball, you're going to demand:
- A large white paper plate
- Tissue paper in any color you would like the iris to be
- Mucilage
- Blackness paper
- A cherry-red marking
Step 1: Tear Upward The Tissue Newspaper
Tear the tissue into small-scale squares and chunks, and so apply these to build the iris in the center of your paper plate. You probably want to use the underside of the plate, and you could draw yourself a rough circle to use equally a guide.
Pace 2: Cutting Out A Pupil
Draw and so cutting a circle from the black card and glue it in the middle of the iris. You can add a little spot of white paint or paper to make the centre expect shiny.
Step 3: Draw Red Veins
Grab your ruby pen and draw some veins coming from the colored iris toward the border of the plate. Squiggly lines that separate into i or two places and run to the edge should wait great. Effort not to overdo this; y'all can ever add together more than subsequently.
Hey presto, you've got a creepy stare ready to be hung upward!
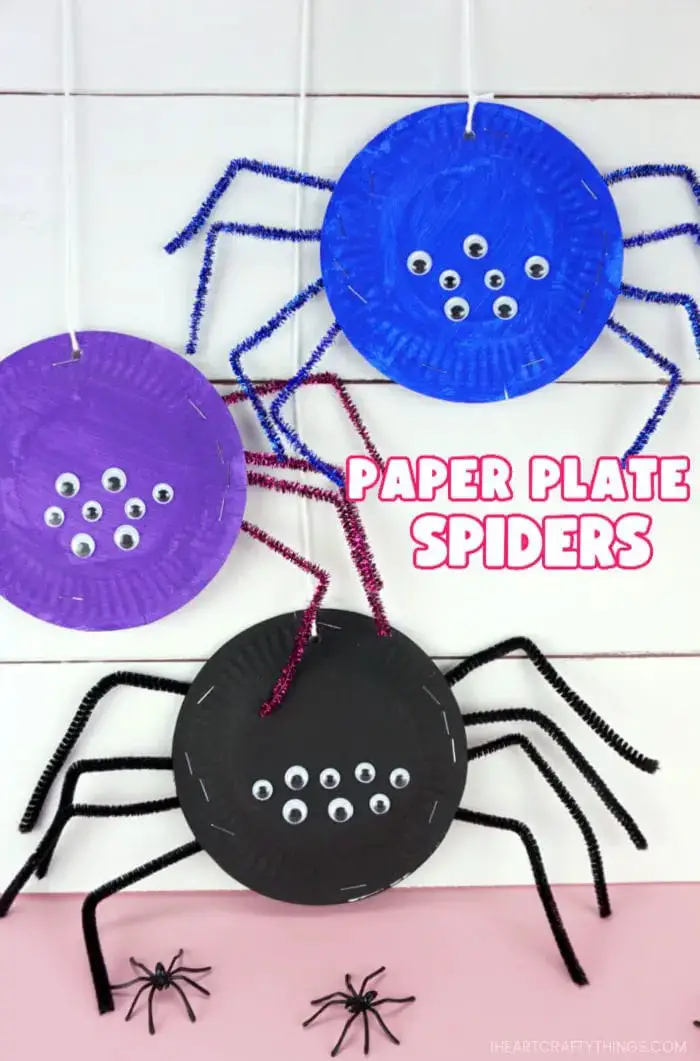
Paper Plate Spiders
Source: https://iheartcraftythings.com/newspaper-plate-spiders.html
What'southward a Halloween commemoration without spiders? Y'all can take great fun here and get as creative every bit you like. This is a absurd craft to do with kids also, and you can either hang these fiddling fellas up with some fake cobwebs or dangle them in doorways to prey on the heads of unsuspecting passersby.
Materials:
Your spooky spiders will crave:
- 2 newspaper plates per spider
- Paint in whatever colour(s) you want your spider(s) to be
- Plenty of googly eyes
- Pipe cleaners
- A paintbrush
- A glue gun
- Thread or yarn
Stride 1: Paint The Plate
Pigment your two paper plates in whatsoever colour you choose (who says spiders accept to exist blackness?) on the bottom sides, and exit them to dry. Acrylic paints are best for this, as they will give you nice, bright colors and an even look.
If you don't want to paint your spider, you could tear up some paper or tissue paper and glue it on instead, but this may requite you lot a slightly patchier wait.
Stride 2: Mucilage The Plates Together And Add together Legs
Cut your pipe cleaners in one-half, and bend them to create convincing spidery legs.
Gum your ii newspaper plates together with the painted sides facing out, leaving some gaps for the legs. Poke the legs in through the edges and add more than gum to the edges to ensure they are well fixed in place. Curve the legs near a bit more, making your spidery shape perfect.
Step 3: Mucilage The Googly Optics
Catch viii googly eyes and adapt them on the "face" of the spider. You could use glow-in-the-nighttime googly eyes for fifty-fifty more upshot, or crazy colors to brighten them upwardly. Selecting several different sizes is as well very constructive.
Step 4: Hang Your Spider Upwardly
Punch a hole at the height of your spider'due south trunk and thread some yarn through its trunk, and then hang it up. These plates will wait particularly good with faux cobwebs abaft around them, possibly even hanging down from their legs.
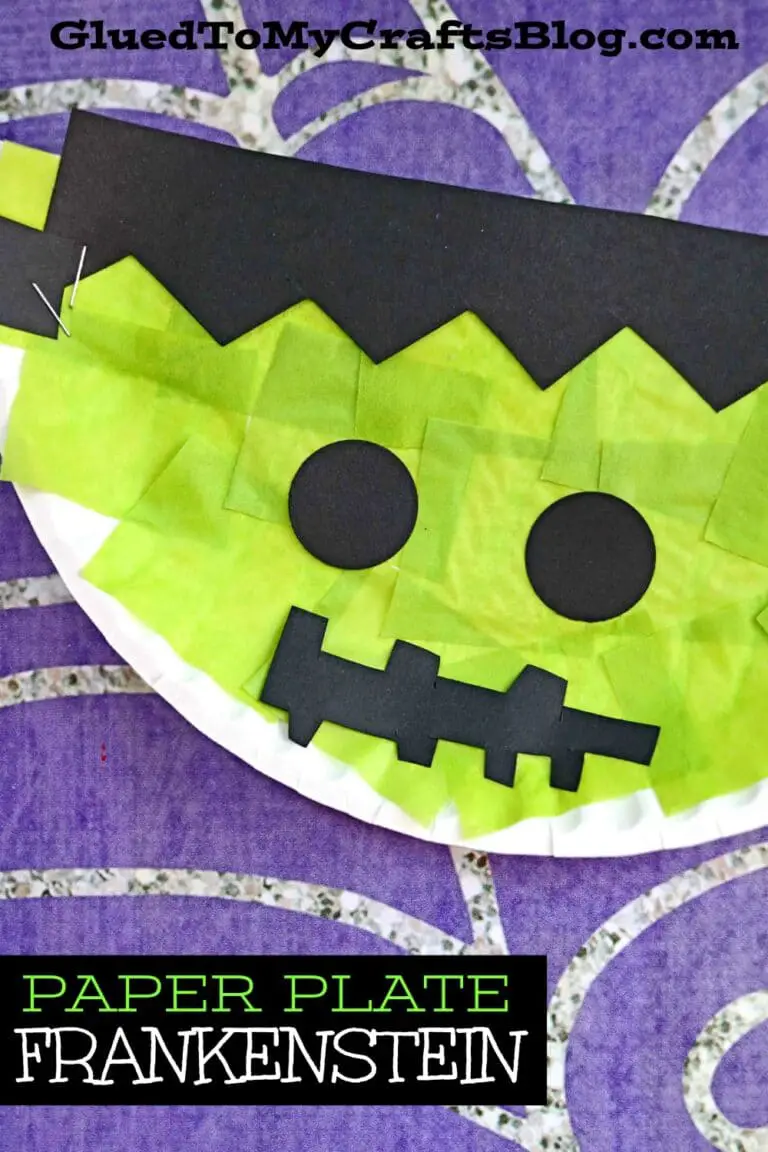
Paper Plate Frankenstein's Monster
Source: https://www.gluedtomycraftsblog.com/2015/09/newspaper-plate-frankenstein-kid-craft-ii.html
For a last, super simple paper plate craft, let'south create a Frankenstein'southward Monster. These are really elementary, so they're perfect if you've got kids who would like to get involved. They too only require one-half a paper plate, so you can brand several without called-for through your newspaper plate stash too fast!
Materials:
You lot will require:
- A newspaper plate
- Green tissue
- Black paper
- Scissors
- Glue
Step 1: Cover The Plate
Cut your paper plate in half and cover it in green squares of tissue paper to create Frankenstein's Monster'due south iconic skin. It doesn't demand to be perfect, and yous can gum on a few other colors if you want to create a patchy, moldering effect.
Pace 2: Cut Out The Features
Yous'll want some tufts of blackness hair, some little round optics, a choppy oral fissure, and two bolts for either side of the caput. The mouth should look scary, either stitched or with jagged teeth. You could likewise make the eyes slanted to make them ambitious.
Step 3: Glue The Confront On
Mucilage the eyes and rima oris in identify, and then add the pilus. Yous could also requite your little Frankenstein's Monster eyebrows. Glue the bolts to either side of the paper plate, and you've finished a great Frankenstein's Monster plate, perfect for decorating the table or door with!
Paper Plate Bat In The Graveyard
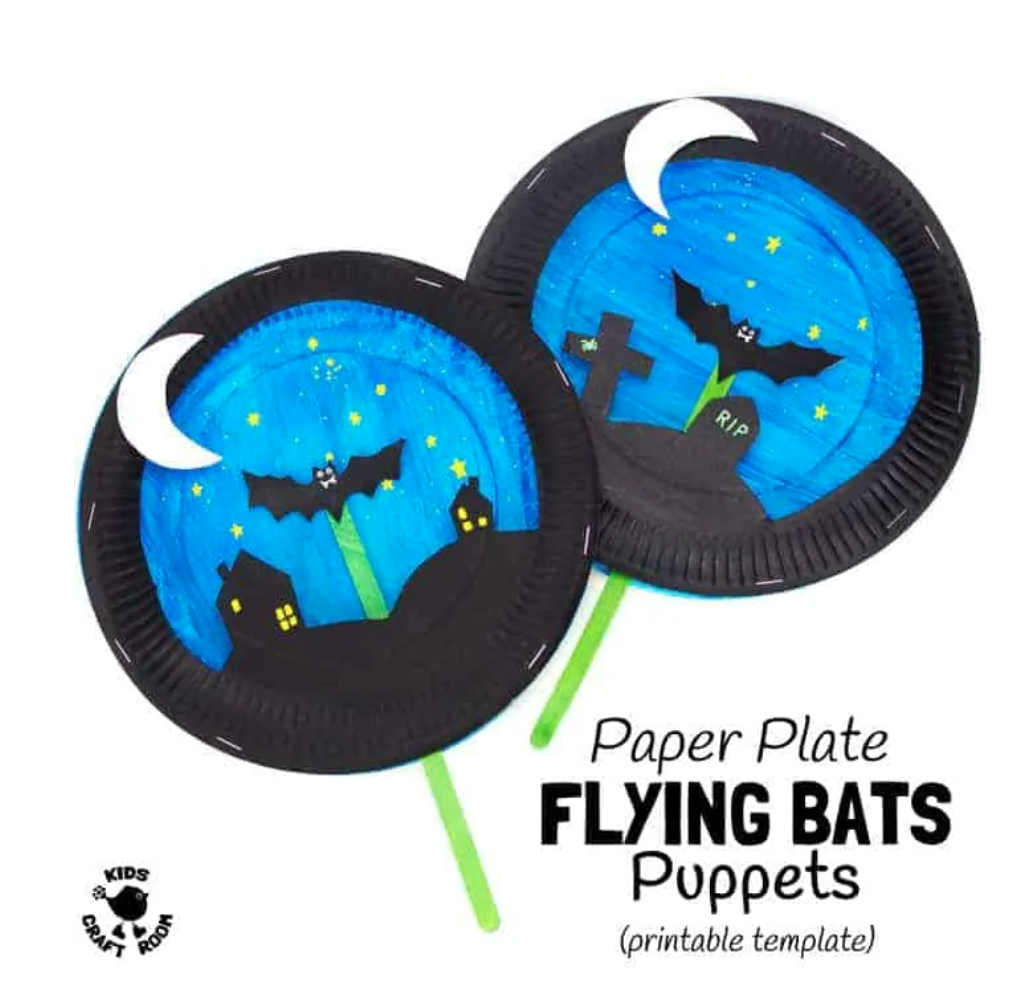 Source: https://kidscraftroom.com/paper-plate-bat-puppet-craft/
Practise you dear interactive crafts that volition continue your child entertained even after the crafting session is washed? If and then, this is the perfect one for you, because it creates an utterly adorable bat puppet that your kid can control and play with for hours.
This is a great craft for teaching your child a bit about bats as you brand it, and it's not too complicated – although an adult will probably need to help with a few parts of it.
To make this clever and unusual craft, y'all volition need the printable bat craft template, two craft sticks, some paint in various colors, some paint pens, some mucilage, a stapler, and 2 paper plates. With a little chip of piece of work, your child volition shortly have a super beautiful bat puppet craft that they tin show off to everyone at schoolhouse.
This probably isn't the simplest craft that y'all can do, but that makes it a wonderful challenge for a child who is keen on crafting and making something interactive. Information technology is besides something fun for older siblings to evidence to younger ones, who will enjoy the moving bat even if they are too niggling to create one.
Don't be deterred, because it's really easier to brand than it looks, and information technology's a fabulous teaching method, equally well every bit being fun!
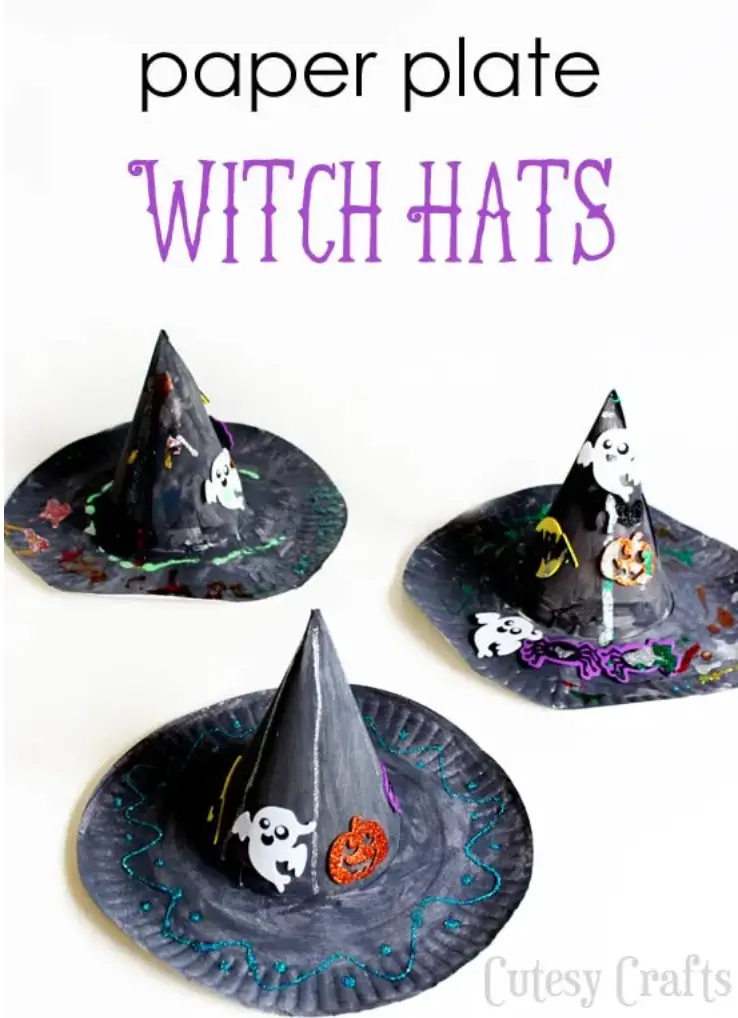
Paper Plate Witch Hat
Source: https://cutesycrafts.com/2015/10/halloween-arts and crafts-for-kids-paper-plate-witch-hat.html
A paper plate witch lid is another very inventive way to turn a paper plate into a Halloween decoration – and vesture ornament at that! You can take a lot of fun with this and kids will love adding information technology to their costumes.
Materials
For this arts and crafts, you're going to require:
- one Paper plate
- 1 Party lid
- Black paint
- Paintbrush
- Scissors
- Record
- Gum
- Decorative items
Step 1: Paint Your Plate And Hat
You want both the plate and the hat to be a actually solid blackness. Get your child to pigment one component while you paint the other, and then bandy so you lot get a couple of coats.
Don't forget to put downwards newspaper, dress your kid in old apparel, and add an apron if yous're going to use acrylic paints for this.
You may discover that the hat needs to exist turned within out (if this is possible) in society to paint information technology well, every bit many party hats are shiny cards on the outside, and the pigment won't stick to this. If you lot oasis't got a party hat, y'all can only brand a cone out of cardboard.
Pace 2: Describe Around The Chapeau
Put the hat on the paper plate and draw effectually it with a pencil. Describe another circle a couple of centimeters smaller inside this one, then get your scissors in at that place and cut neatly around the inner circle (not the larger one).
Step iii: Cut Slits In The Hat
Cut some slits of around iv-6 centimeters all around the lesser of the hat, but be conscientious not to cut through the elastic that holds the chapeau on your head. Once you've gone all the way around the edge, bend these flaps outward so that the lid has a flat base.
Step 4: Fit The Hat To The Plate
Slot the hat into the hole you made on the plate. Yous might have to cut off a trivial scrap more of your circumvolve, but it should fit pretty well.
Pull the elastic through and make certain it's hanging down under the plate. Adjacent, go your kid to assistance you lot record or glue all the flaps to the underside of the plate, nice and deeply. Let the gum dry if you use glue.
Step five: Affect Upwardly And Decorate
You lot might need to touch upwards the paintwork where you've been cutting, merely otherwise, your hat is ready to decorate!
You can apply annihilation to decorate your hat, but hither are some cool ideas your kids will love.
Rubber spiders are a great option. You could even have one hanging downward from the front of the paper plate brim on a little black thread. Alternatively, get some fake spider spider web and air current it around at the top of the lid, and set little spiders in it. The web volition aid them stand up out against the black chapeau.
Y'all could also buy some Halloween-themed stickers, such as little ghosts or pumpkins. This is great for little kids who desire to decorate their hats.
Y'all could use some bright yarn to create a web between the chapeau'southward top and its brim by punching a couple of holes and weaving the thread through. Add a spider to the eye and you've got a great spidery look.
You may have your ain ideas on how to decorate based on what you've got to hand – that'southward great! Go crazy and make your hat look amazing.
If you used cardboard to brand your hat cone, don't forget to add a lilliputian piece of elastic so that information technology will stay on your child's head, otherwise, the meridian-heavy hat volition just go on falling off.
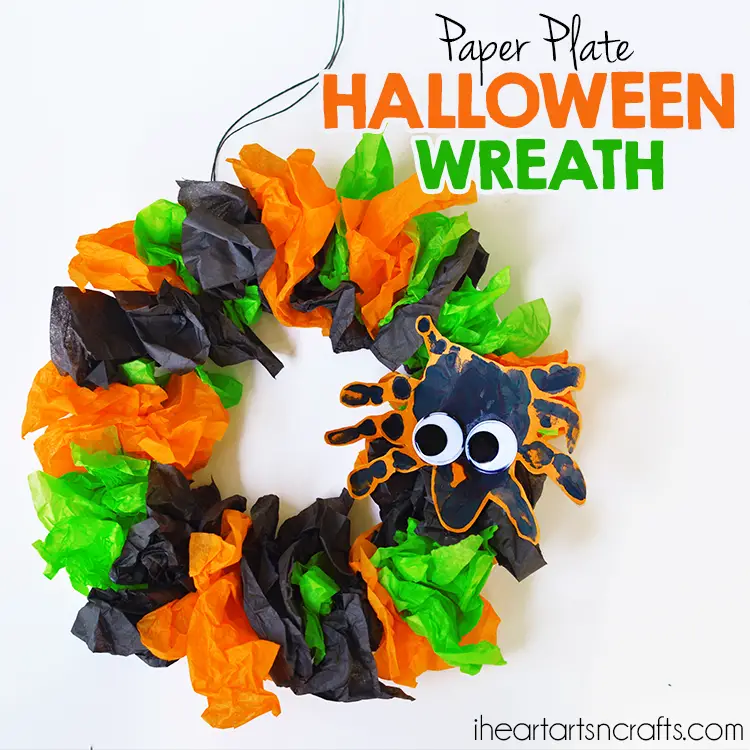
Paper Plate Wreath
 Source: https://www.iheartartsncrafts.com/halloween-paper-plate-wreath-kids-crafts/
Wreaths are a smashing way to decorate your doors on any vacation, and Halloween wreaths can exist easily made with newspaper plates. This is a fantastic arts and crafts for younger kids, and you can have as much fun as you like decorating and perfecting your wreath. Get a whole collection going for every door in the house!
Materials
For this craft, yous're going to require:
- 1 paper plate (per wreath, so more if you lot want to up the decoration ante)
- Orange, light-green, and blackness tissue paper
- Scissors
- Hanging ribbon
- Glue
- Decorative items
- Red, black and blue pens
- Pigsty punch
- Thin thread
Step 1: Cutting Out The Heart Of The Paper Plate
Take hold of your scissors and cut out the middle of the paper plate and so you tin can brand the wreath using the outside. This doesn't really need to be too neat, as you lot are going to hide nearly of it behind tissue paper anyway. Keep the center of the plate for subsequently use.
While you are cutting, go your child to tear upwards some squares of tissue paper in the iii different colors.
Stride two: Scrunch Up The Tissue And Add together It To The Plate
Next is something your child will actually savor – scrunching the tissue. You lot can practice this as much as you like, creating tight little assurance or loose, trailing strands, or a mixture. Information technology'south totally up to you and your child, depending on the look you'd like to achieve.
In one case your tissue is scrunched, grab your glue and spread a band effectually the plate wreath. Y'all should too add a petty pool of glue to a dish and so that yous and your child tin can dip the tissue paper in the glue and then stick it to the wreath.
Y'all can just add together a thicker ring of glue to the wreath if you'd rather not be dipping in glue (as this can get messy), just make certain that the tissue is properly stuck.
Footstep 3: Decorate And Tie A Ribbon On
Add rubber spiders, fake cobwebs, stickers, or anything else you similar to decorate the wreath – or leave it plain if yous like the tissue look.
Either punch a pigsty in the top of your wreath or just tie the ribbon through the center of your paper plate so that yous tin hang it up on the door. Choose a ribbon in nice Halloween colors, or one that is sparse and won't detract from your blueprint. Y'all can tuck it under the tissue paper to hide it if necessary.
Step iv: Eyeball Center
Grab the center of the paper plate that you cut out earlier, and depict a circle on it. Cut this out; y'all're going to help your kid plow it into a spooky eyeball for the center of the wreath.
Draw an iris using your blueish pen, and a pupil using the black, leaving a piddling white circle to make the center look shiny. Next, let your child color in the iris, and then add bloodshot veins running from the edge of the iris to the edge of the circumvolve. You may want to decorate both sides if your child has the patience.
Dial a hole at the meridian of the eyeball and thread information technology onto some thin cotton. At present, brand a small-scale hole at the top of your wreath's inner circumvolve and necktie the cotton fiber through it, attaching the eyeball in the centre.
This eyeball tin can stare at all your guests as they enter the firm, giving them a not bad Halloween-y scare!
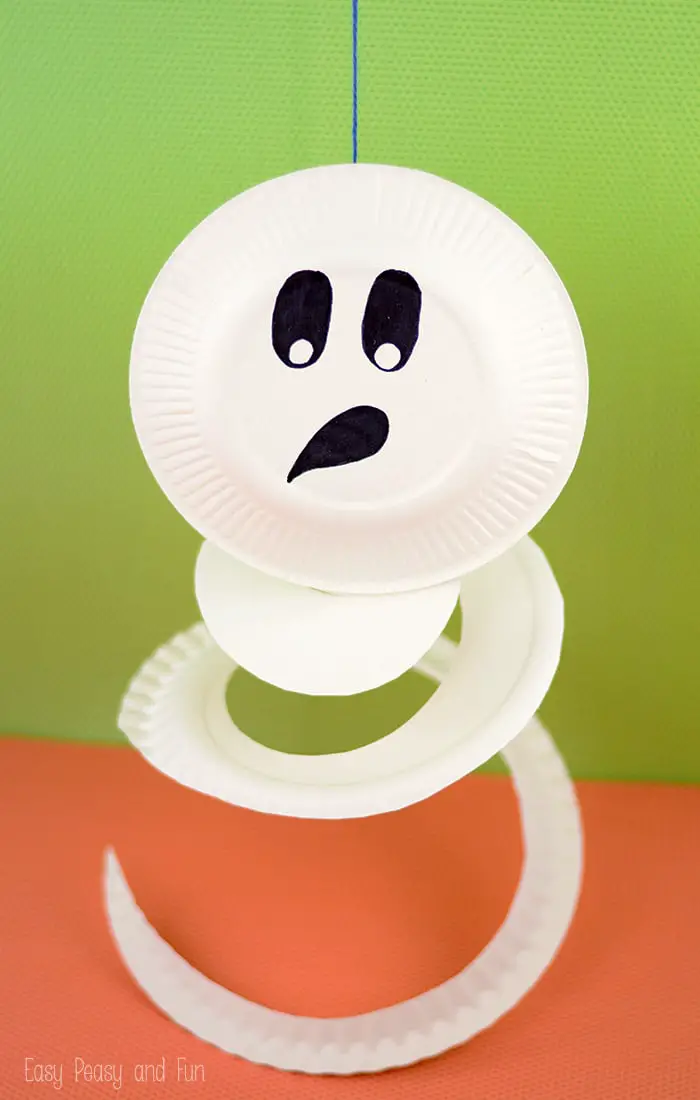
Paper Plate Ghost
 Source: https://www.easypeasyandfun.com/paper-plate-ghost/
Do you love Halloween and letting the kids help decorate? If and so, these paper cup ghosts are the perfect activity to do with the little ones, because they are uncomplicated, fun, and don't need a huge corporeality of complicated materials.
Yous just need to buy some plain white paper cups, some white tissue, and a mark pen, and you're all ready to create some chilling ghosts with your child. Most of these items are very readily available at local stores, and should keep your kid quiet for hours while they create the ghosts.
One time completed, the ghostly cups can exist hung overhead to distress all your guests with their waving tendrils and spooky faces. You can make a whole host of ghost cups with your child, so that there is a fleet waiting to attack unsuspecting visitors.
Y'all can even hang these up in a tree to startle people who walk past. Your child might like to pigment scary faces on some, and friendly or happy faces on others to create some variety and brand each ghost unique.
Cleanup after this activity should be relatively simple, and it more often than not utilizes newspaper, so it'due south an inexpensive craft to do. It is as well suitable for a range of ages, which is neat if you have more than than 1 child, or yous want to do this in a classroom setting.
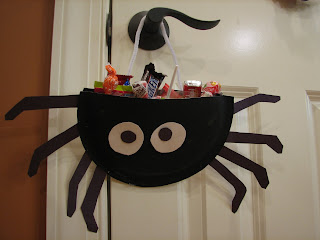
Paper Plate Spider Treat Handbag
 Source: https://jennwa.blogspot.com/2008/10/newspaper-plate-spider-candy-holder.html
For those people who go play tricks-or-treating to just a few houses, this small, gangling paper plate spider care for bag is perfect for them.
To brand one such bag, you will be needing:
- Newspaper plates (one per bag)
- Black construction paper
- Googly eyes
- Black paint and a paintbrush
- Glue
- Scissors
- Pipestem cleaner
Here's how to construct the treat bag:
- Cut the paper plate in half and paint the backside (and the forepart side, too, if you'd similar) black.
- On the construction paper, depict 8 spider legs, and cutting them out. Glue them to one one-half of the cut paper plate, 4 on each side.
- Mucilage the two halves together to grade a pocket.
- Glue on your googly eyes and the pipe stem cleaner to brand the handle. And voila! Your paper plate spider treat pocketbook is all fix for pull a fast one on-or-treating.
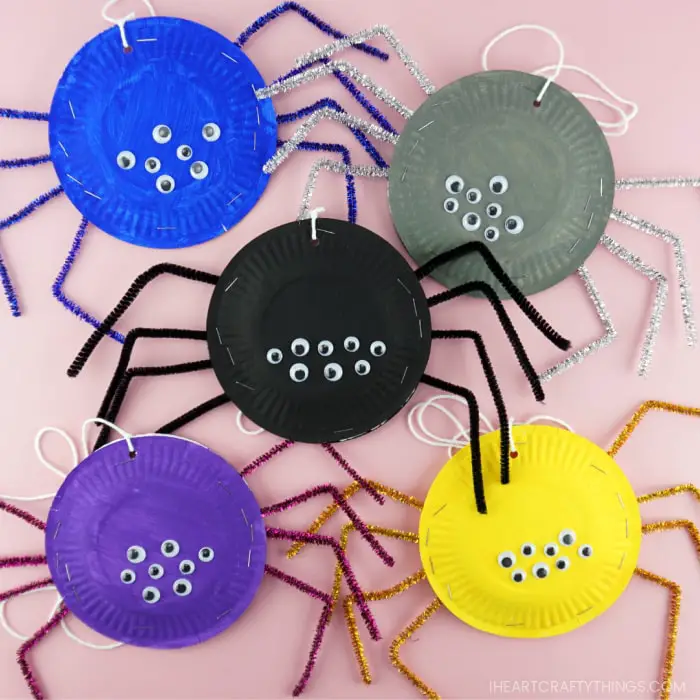
Paper Plate Spiders
 Source: https://iheartcraftythings.com/paper-plate-spiders.html
There tin can never be too many fake spiders hanging effectually on Halloween, and this DIY allows you to make spiders in a multitude of colors.
For this arts and crafts, the supplies needed are:
- Paper plates (one per spider)
- Acrylic paints and paintbrushes
- Tinsel stems in various colors
- Googly eyes
- Stapler
- Scissors
To create the spider:
- Pigment the underside of your paper plate in any color and let it completely dry.
- Next, cut iv tinsel stems of the same color equally your painted paper plate in half. These are your spider legs. Staple them onto the painted paper plate.
- Bend the tinsel stems to brand them look more similar spider legs.
- Glue on the googly eyes — you can use googly eyes of various sizes for a more fun look.
- Finally, punch a pigsty at the top of the spider and thread a string through information technology. Your funky, colorful spiders are now ready to dangle.
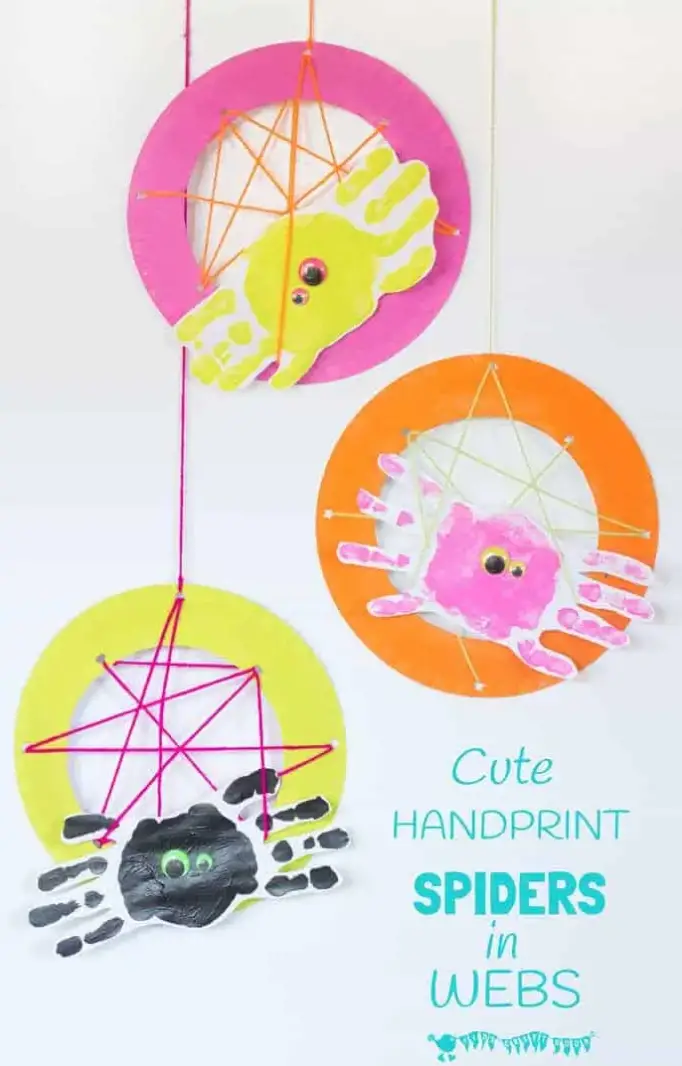
Handprint Spiders in Webs
 Source: https://kidscraftroom.com/beautiful-handprint-spiders-in-webs/
Do you honey using your child's handprints to create beautiful crafts? These are a wonderful way to decorate your dwelling and make precious memories with your piffling ane at the same time – and they are absolutely perfect for Halloween.
The cracking matter about this arts and crafts is that you can use any colors you like, and then no matter how Halloween-y or bright you lot want to be, information technology'southward easy. You just need a few materials, including paper plates, acrylic pigment, some googly optics, a plastic yarn needle, some card stock, and a craft dial.
That means they are pretty cheap to brand, and yous probably already accept a lot of these supplies lying around your abode – then no trips out to the store to choice up actress bits at the final minute. When you're rushing effectually preparing for Halloween, that'due south a major bonus.
Your child tin can make as many of these plates every bit they similar, and they volition expect fantastic twirling and spinning on your ceiling or in a doorway. They might even snag the pilus of a few unsuspecting guests.
You tin can go them out year afterward year, so they are a wonderful fashion to decorate, and at that place's no question that your child will love contributing to the spooky vibe around the business firm.
Simply brand sure you don't accept whatsoever arachnophobes visiting you this year!
Newspaper Plate Vampire
 Source: https://www.craftymorning.com/paper-plate-vampire-craft-kids/
I of Halloween'due south nigh pop characters, here's what y'all need to brand your very own vampire friend:
- Newspaper plate
- Paints and paintbrushes
- Crimson, black and white construction paper
- Scissors
- Gum
On to the construction:
- First, make the outline of the vampire'due south hair on the backside of your newspaper plate with black pigment and fill information technology in.
- Next, paint the rest of the plate with a tan or peach color.
- Using your scissors, cut out the optics, olfactory organ, eyebrows, mouth, and fangs from the construction paper. Glue them all on.
- Alternatively, you tin just paint everything on instead. Feel free to use googly optics instead as well.
- In one case everything is dry, cut out the ears, collar, and bowtie. Glue them on to wrap up this project.
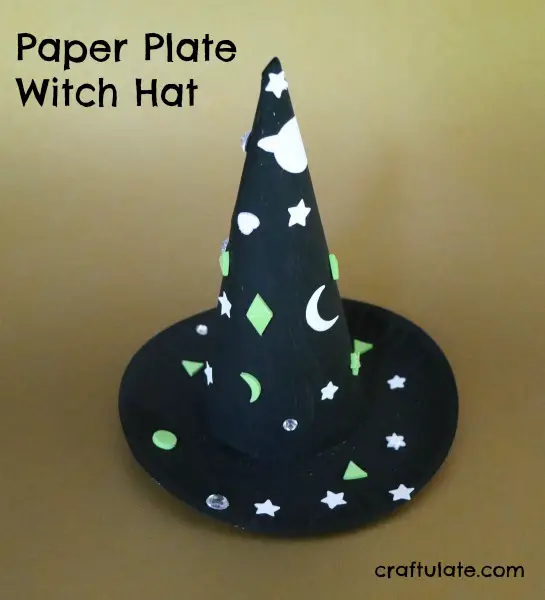
Newspaper Plate Witch Hat
 Source: https://craftulate.com/paper-plate-witches-hat/
This newspaper plate witch hat goes perfectly with a witch costume and broom.
To brand this, yous'll exist needing:
- Paper plate (one per lid)
- White cardstock
- Scissors
- Tape
- Glue
- Elastic thread
- Paints and paintbrushes
- Craft felt paper, pens, stickers, glitter pens, or anything else to decorate the chapeau
Now, to brand the hat:
- Roll the cardstock into a cone shape.
- In the heart of the paper plate, depict a circle with the same bore as that of the cardstock cone. Cut triangular slits into the pigsty.
- Place the cone on height of the hole, and tape up the flaps within the cone. Your hat is now ready to be painted.
- Paint the entire lid blackness, and permit information technology dry.
- Once all the paint has dried off, start decorating! Y'all tin use markers, stickers, felt paper, glitter pens — anything, really.
- In the end, attach elastic to it, and with that, your paper plate witch hat is complete.
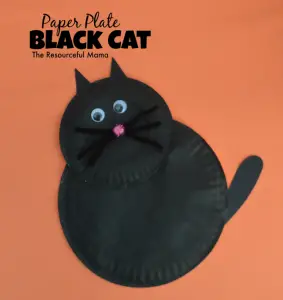
Paper Plate Black Cat
Source: https://www.theresourcefulmama.com/paper-plate-black-cat-child-arts and crafts/
Everyone loves cats, and Halloween isn't Halloween without the customary black cat décor.
To make your own cute feline, you'll be needing:
- 2 newspaper plates — one large, one small
- Blackness construction paper
- Googly eyes
- Blackness paint
- Black pipe cleaners
- Glue
- Pink craft felt paper
- Scissors
To make the cat:
- Paint both paper plates black and allow them dry.
- With your pair of scissors, cut out true cat ears and a tail from the black structure paper. Brand the nose using the pinkish craft felt paper.
- Once the paper plates are dry out, glue the smaller i on tiptop of the larger 1.
- Afterwards that, glue on the googly eyes, ears, nose, and tail. Use black piping cleaners for the whiskers. And with that, your paper plate black cat is gear up for ornament.
Paper Plate Frankenstein
 Source: https://www.gluedtomycraftsblog.com/2015/09/paper-plate-frankenstein-kid-craft-2.html
Channel your inner mad scientist and create your very own green monster, for which you'll be needing:
- 1 large newspaper plate
- Blackness construction paper
- Green tissue newspaper
- Pair of scissors
- Glue
To put together the Frankenstein:
- Cut the newspaper plate in one-half. You tin make ii Frankenstein's from one plate.
- Cut the green tissue paper into modest squares, and mucilage them onto the newspaper plate. Ensure that the plate is completely covered with tissue paper.
- From the black construction paper, cutting out the eyes, hair, mouth, and metal bolts.
- Finally, gum them all on in their designated spots to stop this craft.
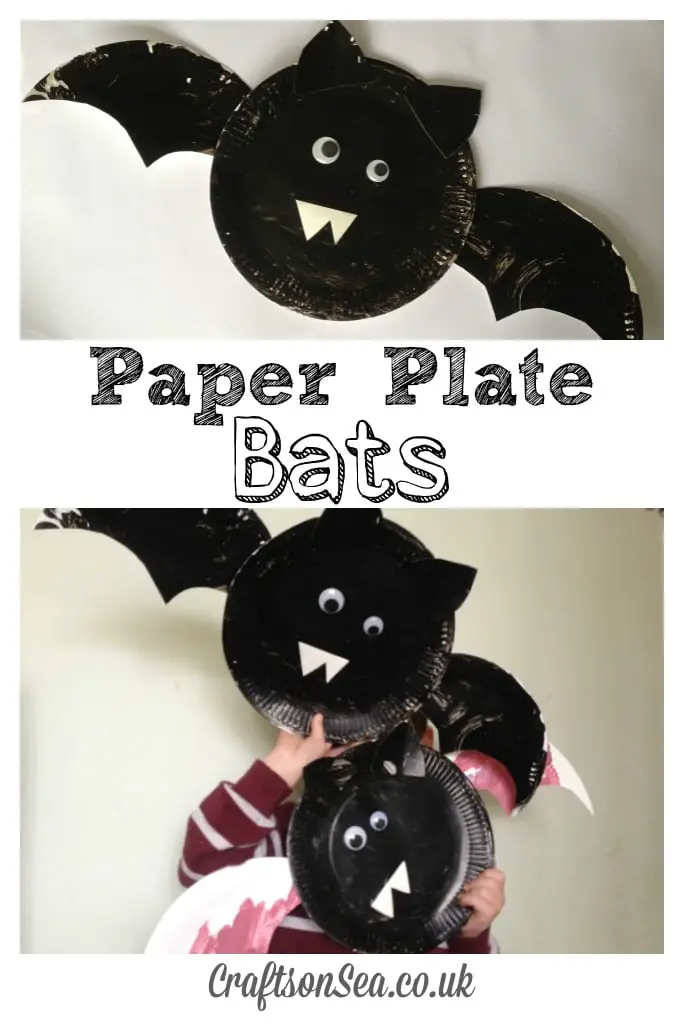
Paper Plate Bats
 Source: https://www.craftsonsea.co.uk/newspaper-plate-bats/
Bats accept been associated with Halloween since forever, so of course, we accept to characteristic a paper plate bat craft as well.
The supplies needed for this arts and crafts are:
- Paper plates (two per bat)
- Black pigment
- Glue
- Pair of scissors
- White construction newspaper
- Googly optics
- Tape
Here'due south how to make these lilliputian mammals:
- Paint both paper plates black, and leave them to dry.
- In one case they have been dried, gently fold one in half for a crease. This crease is your guideline to cutting out the wings.
- Post-obit the crease, cut out the wings in a curved W shape, and tape them to the back of the other painted paper plate.
- Cut out the fangs from the white construction newspaper.
- To wrap things up, glue on the googly eyes and fangs.
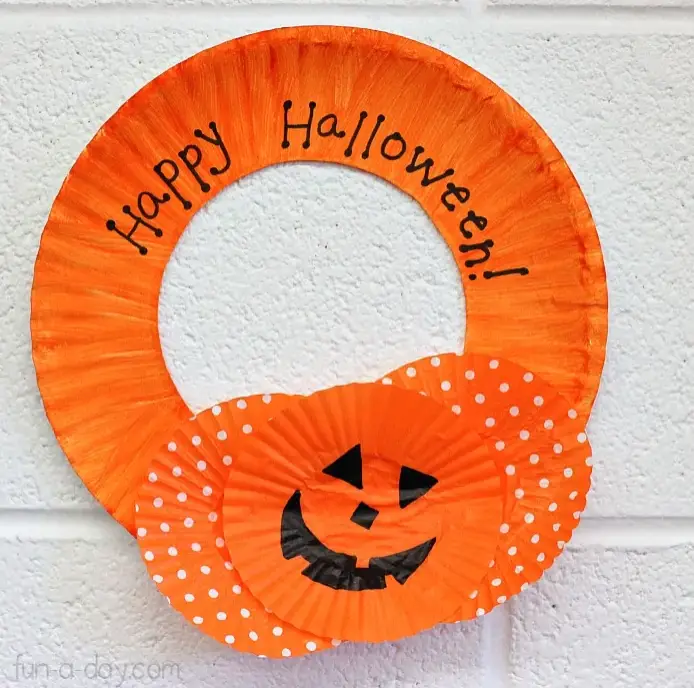
DIY Halloween Wreath
 Source: By Mary Catherine @ Fun-A-Twenty-four hour period, "Halloween Craft for Kids – Cupcake Liner Wreath" (https://fun-a-day.com/halloween-arts and crafts-for-kids-wreath/)
This DIY Halloween wreath is created using one paper plate and a few craft supplies you may have lying around your house and in your stash of craft supplies. This craft may be a little more than complex for younger children, so yous may need to assistance them through the footstep-by-step instructions.
What You Need:
- Paper plate s – you lot volition need one per wreath
- Cupcake liners – you lot can use plain Halloween colors, striped, or polka-dotted liners. For a really festive, colorful wreath you can use these Halloween-themed cupcake liners .
- Orange paint
- Paintbrush
- Glue
- Blackness permanent marker
What You Do:
- To create a "wreath" shape, cut out the eye of the paper plate. You'll want to go out the wrinkled edge and about 1-inch in from the wrinkled edge remaining (this is your wreath). I suggested cutting the plate for your child and so letting them do the remaining steps on their own or with guidance.
- Use the paintbrush and orange paint to pigment the wreath orange . You may want to lay out a large piece of construction newspaper, an quondam sheet/towel, etc. for your child to pigment over. This will make for piece of cake cleanup and foreclose paint from ending upwards on your furniture. Eek!
- Lay the wreath out to dry out . Drying times will vary.
- While yous are waiting for the wreath to dry, have your child draw on the cupcake liners with the black permanent markers . If you are using the Halloween-themed cupcake liners it may be hard to see whatsoever cartoon or lettering.
- If you are using a plain, striped, or polka-dotted cupcake liner, and then endeavour cartoon a jack-o-lantern or spelling out "Boo." If you choose to use regular markers they may smear on the cupcake liners – this is why permanent markers are encouraged.
- One time the wreath is dry, glue your cupcake liners around your wreath still your child wants. This may simply be one cupcake liner or they may want to fill the entire wreath.
- If there is space remaining on your wreath, you tin write spirited or chilling messages on your wreath with the black permanent marker, such equally "Happy Halloween" or "Play a trick on-or-Care for."
Notes:
- You lot tin also brand this craft with styrofoam rings that are used to make traditional wreaths. Just swap out the paper plate in the "What You Practice" section with the styrofoam ring.
- If your child wants to brand multiple wreaths and become more than artistic, you can also paint some of your wreaths purple or black.
- Permit your child hang their DIY wreath on their door, on a playroom door, or on the refrigerator.
DIY Paper Plate Spiders
 Source: Inspired past Caroline @ IHeartCraftyThings, "Paper Plate Spiders" (https://iheartcraftythings.com/paper-plate-spiders.html)
Hither is some other simple Halloween craft using paper plates and common household/ arts and crafts materials. This craft is like shooting fish in a barrel for any young child to do. Although you may use caution when using the stapler. See the notes section if you lot are uncomfortable with your child using a stapler.
What You Need:
- Paper plates – ii plates per spider. Dessert plates work best for this project (more proportional with the "spider legs"), but you lot can most definitely still use regular dinner-sized plates.
- Paint – any color (purple, orange, black, green, etc.)
- Googly eyes – any size, it is fun to utilize a variety if you accept them
- Craft pipe cleaners – use any color, hither are some fun sparkly pipe cleaners
- Paintbrush
- Stapler
- Glue
- Scissors
- Hole dial
- String or twine
What You lot Do:
- Use the paintbrush and whatsoever color paint you chose to paint the underneath side of your paper plates. Lay the newspaper plates out to dry out. Drying times will vary.
- After your paper plates have stale, cut 4 pipe cleaners in half. This will make 8 "spider legs" that you will attach to the newspaper plates.
- Apply the stapler to staple the paper plates together (painted sides facing out) in two spots . Staple once at the meridian and once on the bottom. It is important to leave space in betwixt the paper plates where you volition staple your spider legs.
- Insert each pipe cleaner "spider leg" most an inch in between your 2 paper plates and adhere it past using your stapler. Staple 4 spider legs on each side of the newspaper plate.
- Bend your piping cleaners to brand them appear like spider legs.
- Glue the googly eyes onto the front end of your spider . Glue on 8 googly eyes to have a truthful spider.
- Punch a pigsty at the top of your spider and tie a string through the hole. This will allow you to hang your spider.
Notes:
- If you lot do non experience comfortable using a stapler with your child, you can use tape to secure the plates together and the spider legs in between the plates.
- For smaller kids, it may also exist easier to use the cocky-agglutinative googly eyes . This will eliminate your need for glue and brand for an easier clean-upwards.
- A fun style to decorate with your DIY newspaper plate spiders is to hang them on a window sill at varying lengths.
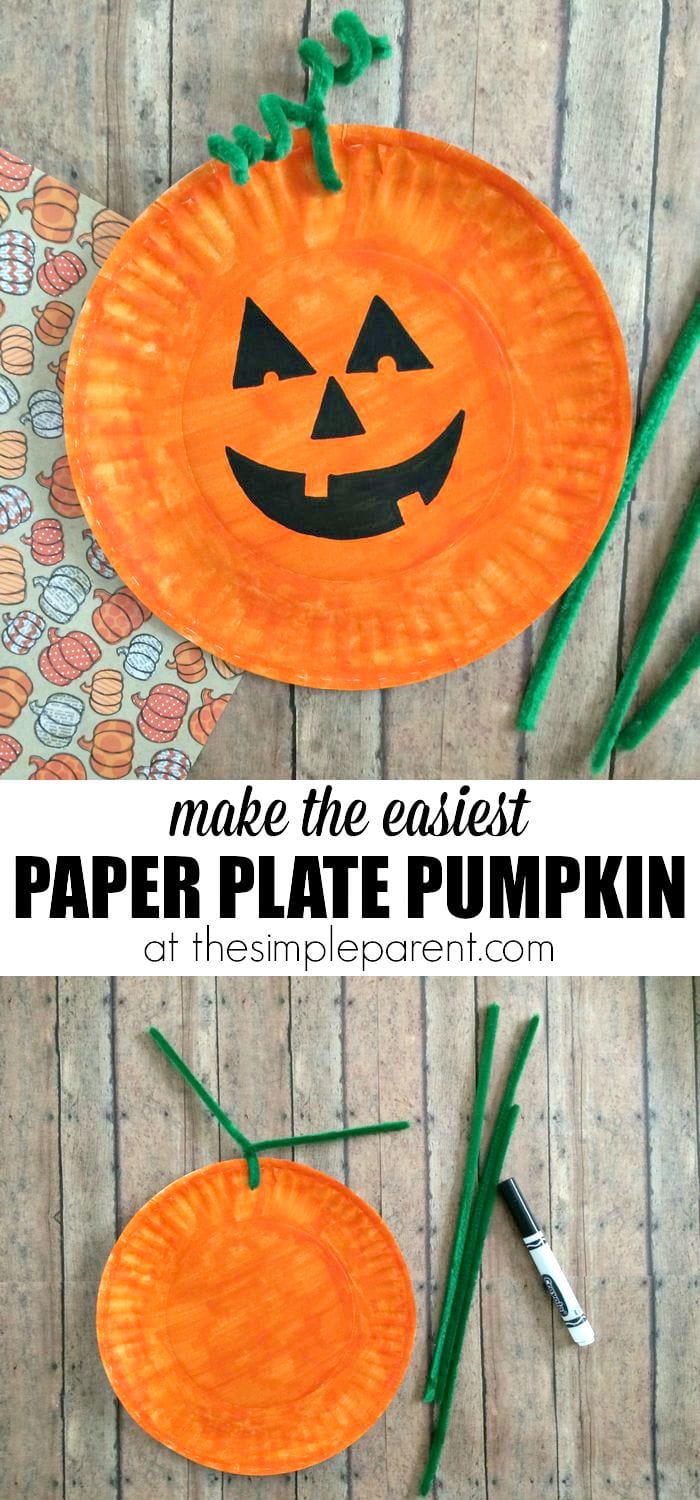
DIY Newspaper Plate Pumpkin
 Source: Past Mariah @ The Simple Parent, "Easiest Newspaper Plate Pumpkin Craft!" (https://thesimpleparent.com/easiest-paper-plate-pumpkin-arts and crafts/)
This DIY Paper Plate Pumpkin is the easiest craft out of the iii we will walk yous through – no cutting or gluing required. This may be the best option if y'all are looking to engage your child with an contained craft or if your child is a toddler.
What Yous Demand:
- Paper plate
- Orange and black markers, crayons, or colored pencils
- Pigsty punch
- Green pipe cleaners
What You Do:
- Utilise your orangish mark, crayon, or colored pencil to colour the whole paper plate orange . This creates the torso of your pumpkin.
- Use the pigsty punch to punch a hole at the top of your pumpkin. This is where you volition adhere your "vine" made out of your pipe cleaner.
- Thread your dark-green pipe cleaner through the pigsty you made with the pigsty punch at the pinnacle of the pumpkin. Twist the piping cleaner around itself to proceed information technology fastened to the newspaper plate.
- Use your mark, crayon, or colored pencil to spiralize the finish of your green pipe cleaner. But twist the terminate of the green piping cleaner effectually your marker, crayon, or colored pencil. Carefully pull the mark, crayon, or colored pencil out of the heart of the pipe cleaner. Viola, you have a cute curly vine to your pumpkin!
- Draw a jack-o-lantern on your pumpkin or allow your kid to freely color and decorate their pumpkin with black markers, crayons, or colored pencils nevertheless they desire.
Notes:
- Y'all may elevate your DIY Newspaper Plate Pumpkins by adding sequins or stickers.
- You tin also use the aforementioned materials to create apples, which are as well fun to utilize to decorate for Autumn/ Halloween. Substitute out your orange marker, crayon, colored pencil for a red one. Utilize a chocolate-brown pipe cleaner for the stalk rather than a greenish ane.
- You tin can cut out dissimilar "face" options for your child to create their own jack-o-lantern. Utilise black construction paper to cutting out different jack-o-lantern optics, noses, and mouths. Let your child mix and match your face elements and gum them onto the paper plate.
- Y'all can hang these DIY Paper Plate Pumpkins or Apples on your fridge or if you have a designated spot in your house for your child'south crafts.
Decision
Halloween is that fourth dimension of the twelvemonth when anybody is abuzz with excitement and the air is filled with happiness and mirth. The fabulous, over-the-top decorations are an integral function of what makes Halloween and so enjoyable, and existence able to craft your own decorations makes everything even better.
Today nosotros covered a plethora of Halloween crafts you tin can brand using paper plates, ranging from fuzzy spiders to wicked monsters to colorful candy corn buntings. All of these crafts are uncomplicated and can as well be contradistinct to create something different.
For example, you can use standard white tissue paper instead of the dark-green one in the Frankenstein arts and crafts, and modify up the features a bit, to make a spooky mummy instead.
And of course, you can get tons and tons of more than brilliant ideas online on Pinterest and YouTube.
The best part is that these crafts are so simple that kids can make them too. Bust out your art supplies and engage them in some creative crafting so they can aid you decorate the house this Halloween.
We hope you lot plant these crafts fun, creative and helpful. Now, get and accept a blast trying these out!
Source: https://craftwhack.com/halloween-paper-plate-crafts/
0 Response to "Popular Halloween Paper Plate Crafts - Ghost, Spooky Eyeballs, Spiders"
Post a Comment